


What is an API?
API is the acronym for Application Programming Interface. Like the name implies it serves as an intermediary that allows interaction and communication between software products.
So with APIs, you can integrate features, products, and services from already existing ones into your application without building them yourself.
Why you should use an API?
- It helps you get access to large data: With APIs, you don’t have to hard code data into your web application, you can just connect to an API and get real-time data or dummy data as the case might be. For example, you can build a weather app that tells the weather condition of a place without knowing the actual weather condition yourself.
- It helps you integrate cool stuffs to your website: You can integrate cool stuff easily like payment gateways, google maps, authentication channels from popular sources like Google or Facebook, services from eateries, agriculture, health, movies, etc
- APIs are great time savers: APIs allow developers to save time by taking advantage of a platform’s implementation to do the nitty-gritty work. This helps reduce the code developers need to write and also helps create more consistency across apps for the same platform.

Photo by Nathan da Silva on Unsplash
Getting Started???
Firstly, you need to know what kind of API you need, what kind of application are you trying to build or what feature do you need from the API?
When you have settled that, you can then proceed to find an API to suit your need. While there are free APIs available, you might need to pay to be able to use some, you can find free APIs here and here.
After settling for which API to use, go to the APIs documentation or website on how to use it.
In this article, I am going to be creating a web page that displays pictures of cute dogs(I don’t like dogs tho).
Here is the link to the documentation we’ll be using: Link
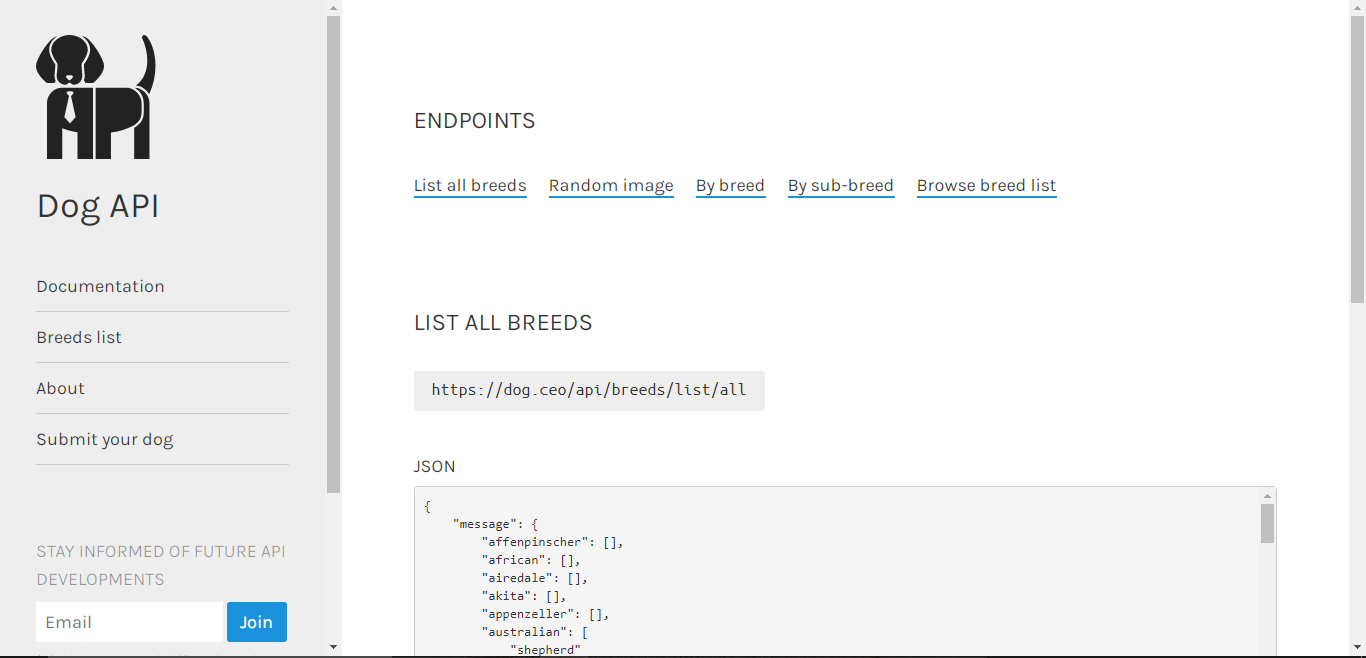
Home page of API documentation
Reading the API Documentation for information:
Before you start using an API, you should first read their documentation to know how to use their API because although all API basically work through the request and response method, they might just have different methods of doing that.
Most of the time, the documentation will include examples that you can tweak to get the output that you’re after.
Some APIs require you to sign up before using them mostly for authentication purposes and to track your requests. After signing up and confirming your email and then you can now locate your dashboard for your API key.
But in this case, we don’t need to sign up, we can just use the API straight away.
Getting an API key
An API key is a unique identifier or code that is used to authenticate and connect to an API. It is mostly used to track your requests. Now the API key may not necessarily be to track the user as you can have more than one API key, rather it is used to identify the application or program that is calling an API.
Note that not all API requests for an API key, also your API keys is like a password that shouldn’t be shared with other people.
Like I mentioned earlier, we don’t need an API key for this article, just have that in mind for subsequent APIs you would be using.
Fetching/Requesting data from the API:
To start, you would need to create an HTML, CSS, and Javascript file so you can practice along.
Here is my HTML file, we would be using JavaScript to generate data from the API :
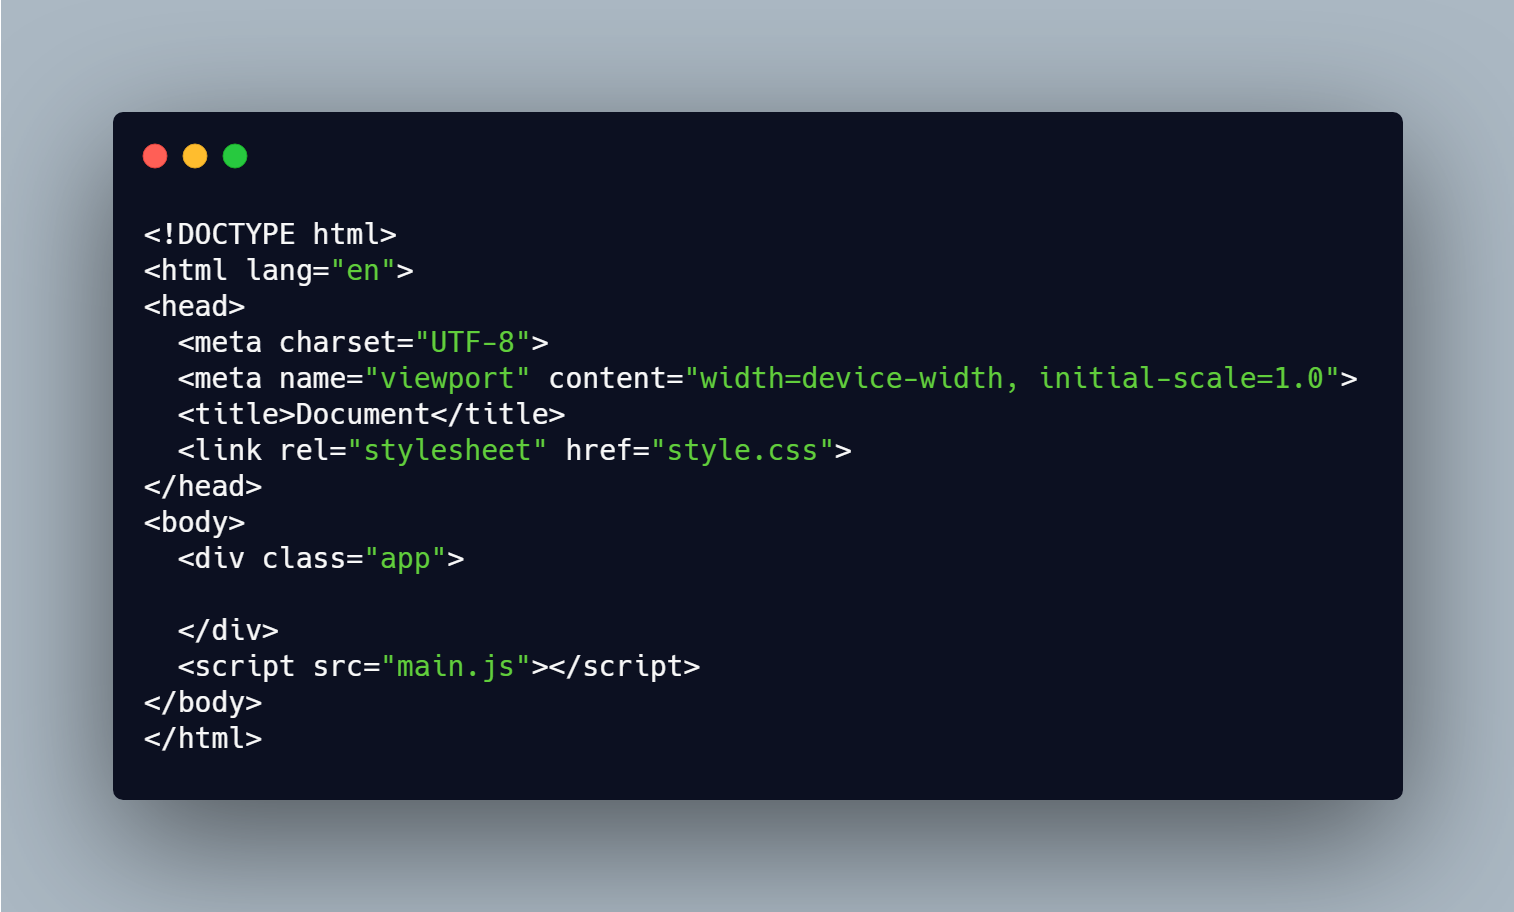
HTML file
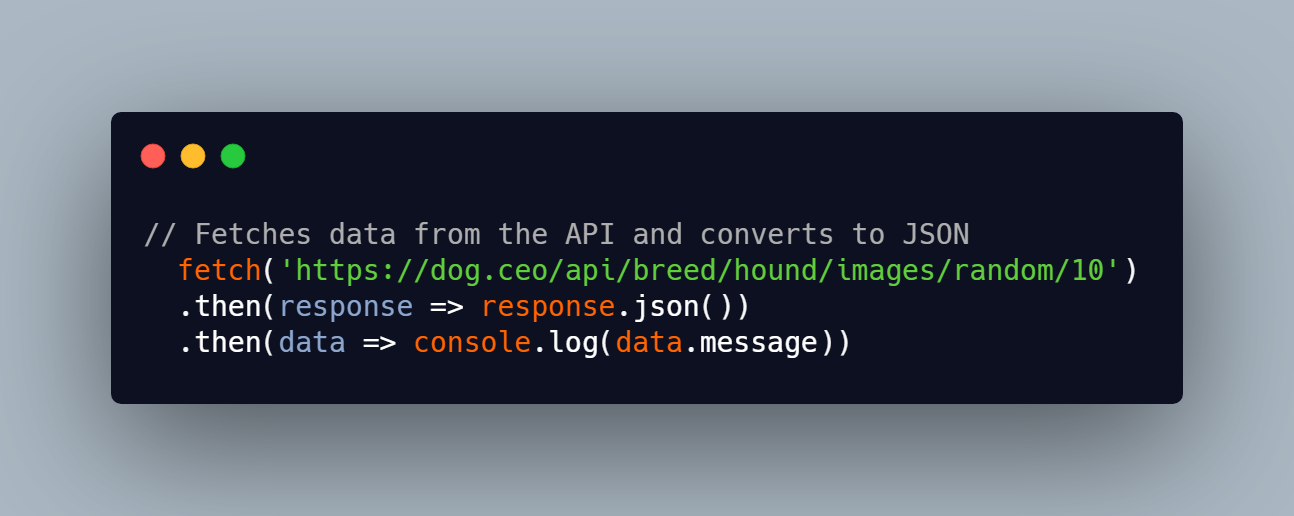
Since APIs work through a request and response method. You need to send a request using HTTPS and fetch(). This has become the standard way of calling APIs in JavaScript.
The fetch() method allows us to perform HTTP requests to a server. If we want to access the data, we require two .then() handlers. We first define the path (fetch), request data from the server (request), and define the content type(body) using the .then handler(call back), then finally access the data (response) using the .then() handler.
Here’s what I mean:

Applying the same method, we do this:
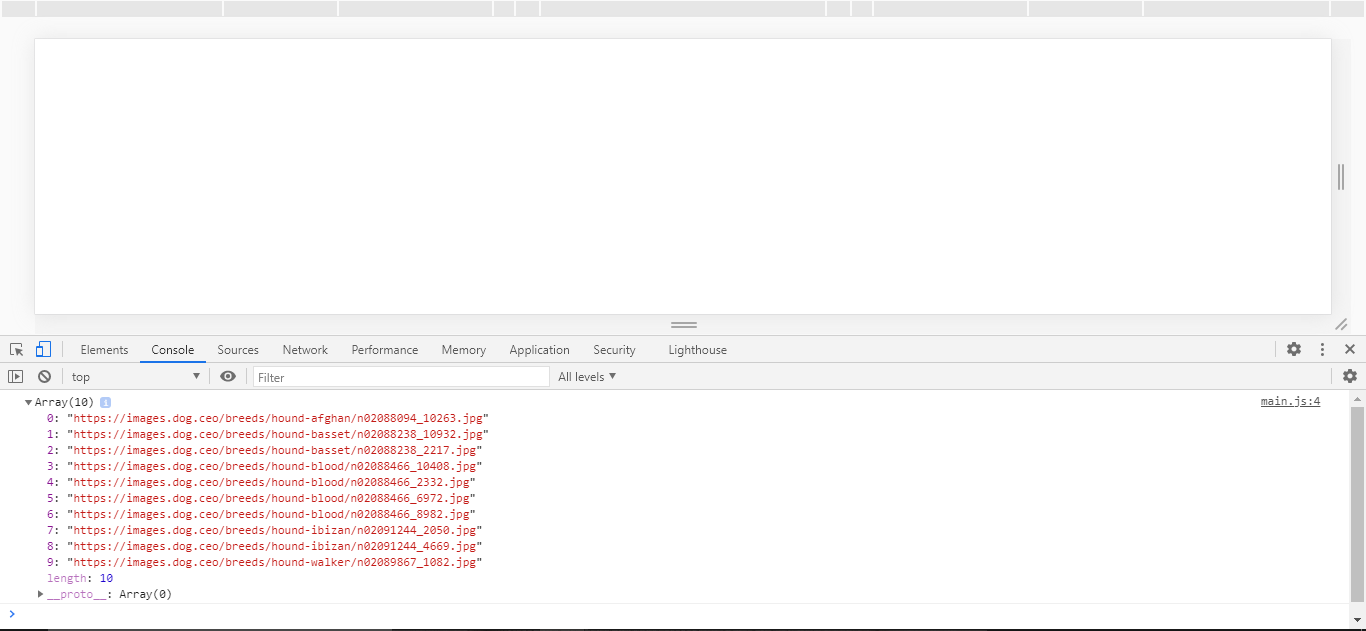
We can check the console in the Developer tool of the browser to see if it works
Displaying data on the browser
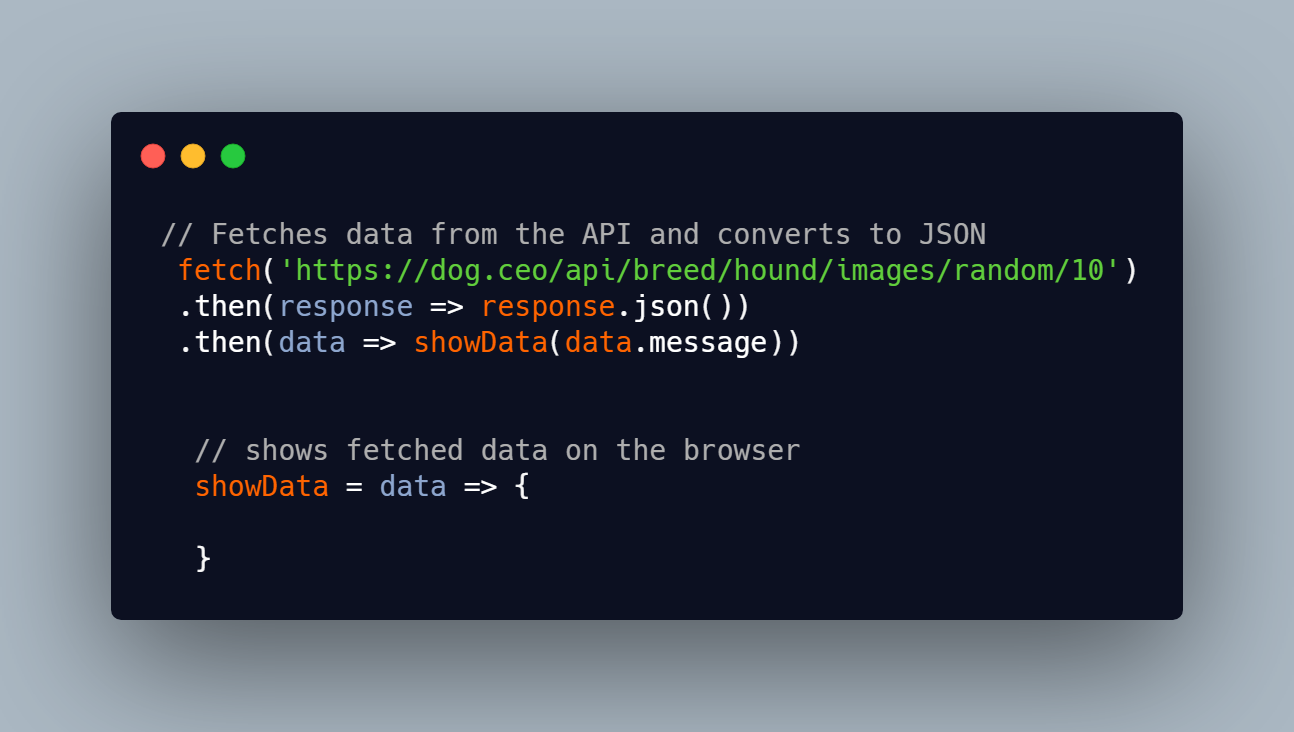
Now that we have successfully retrieved data from the API, we have to now display it on the browser using the DOM. The DOM allows JavaScript to communicate with HTML. If you are not familiar with using the DOM, read this guide.
We’ll change that console.log to a function so we can use the data easily without running into any access errors. We will create an arrow function and use data as its parameter. Every other code henceforth should be written inside this function.
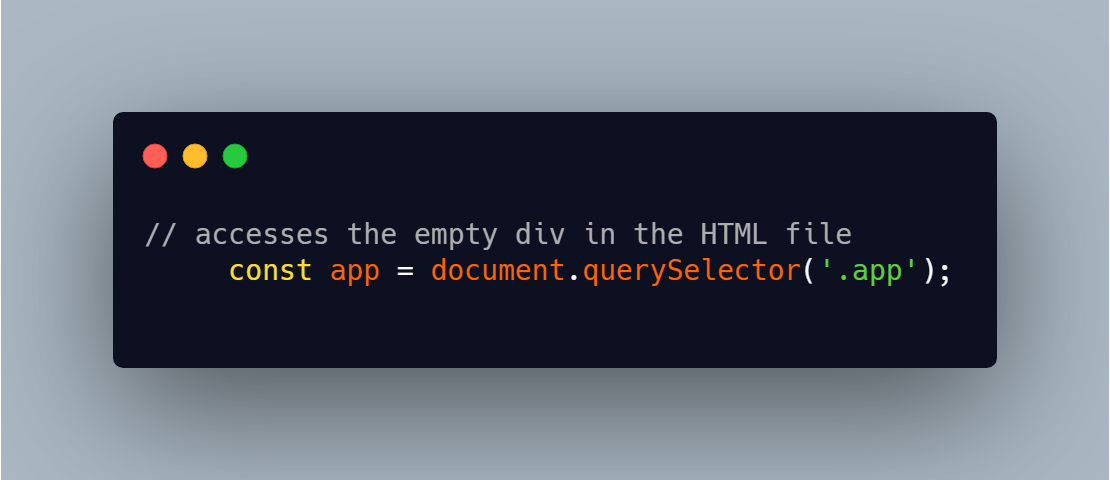
Since we just have one root element in the HTML file which is the .app div. We’ll access it using querySelector().
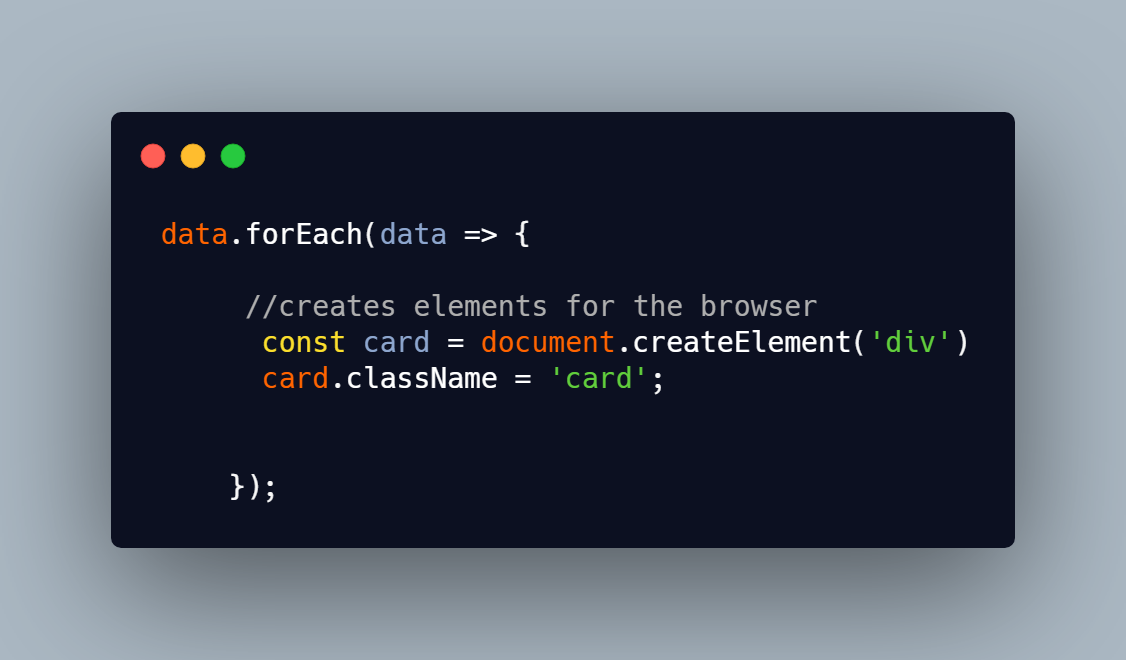
We would then use forEach() to display the pictures from the array of images, we want each image to be in a div and they should all be in the .app div.
Using createElements() We can create a div and give it a class name of card using className. Here is the code:
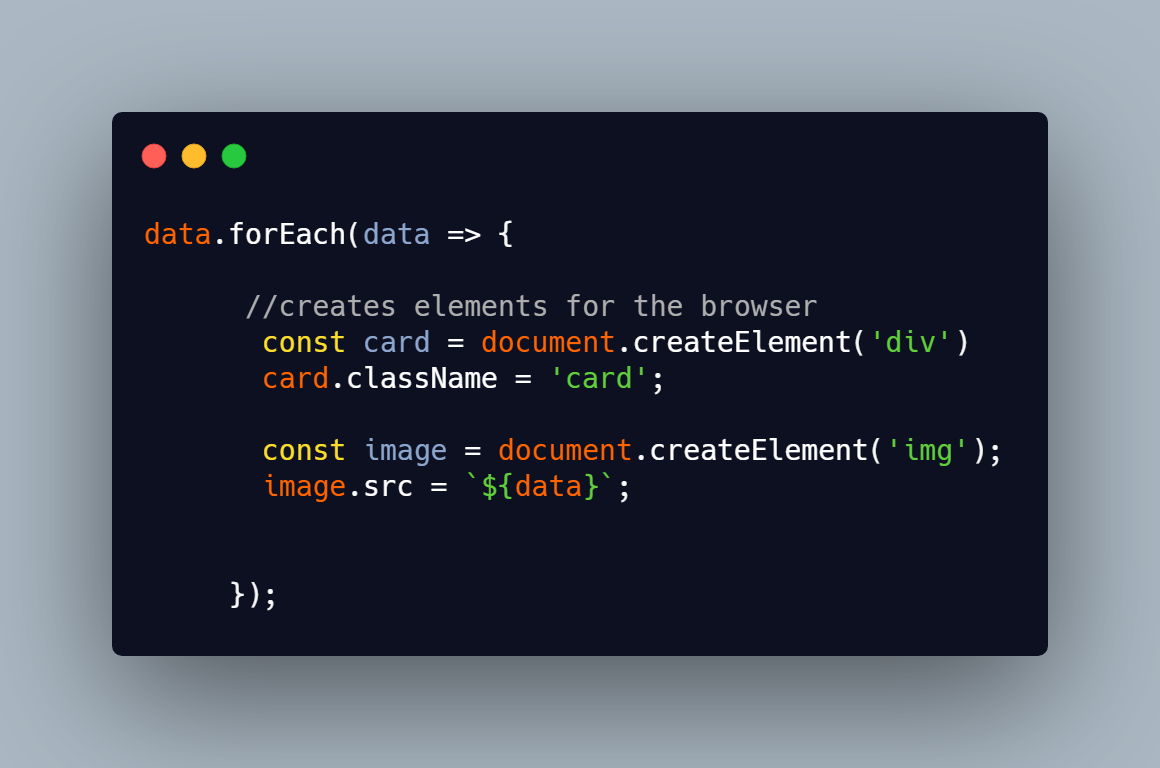
We would repeat the same steps to create an image element and set the source to the image URL from the API. I used a template string to avoid repeating the same code multiple times.
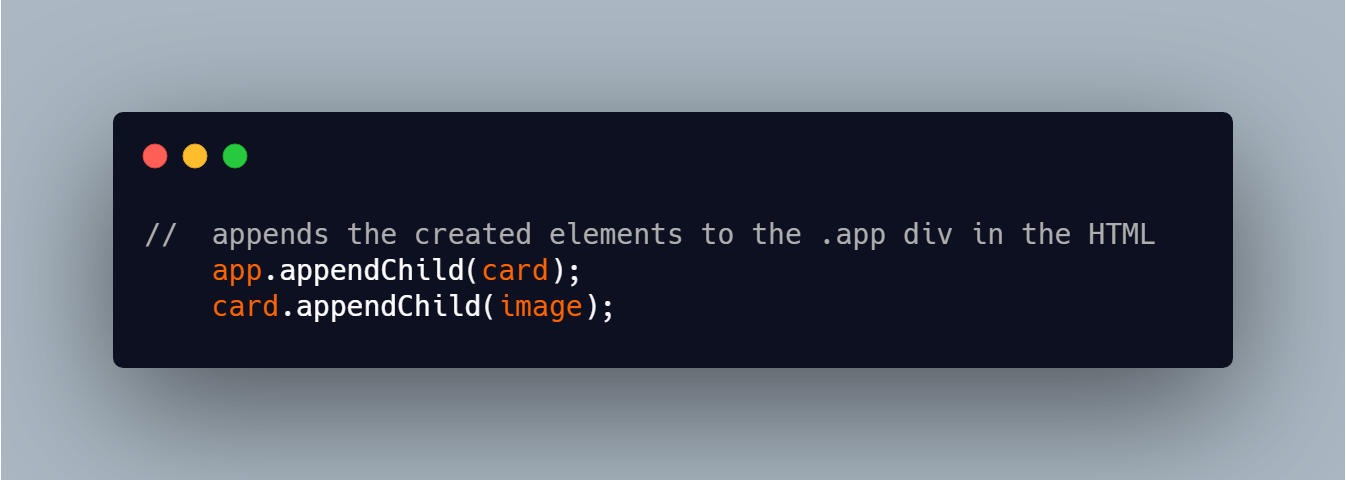
Okay great, we are done with that but this is only visible in the console, to make it show in the browser, we’ll append it to the .app div already in the HTML file using appendChild(). We’ll append the card div to the .app div and then the image to the .card div. Here's the code:
So far, this is what the code looks like:

And Viola! we are done.
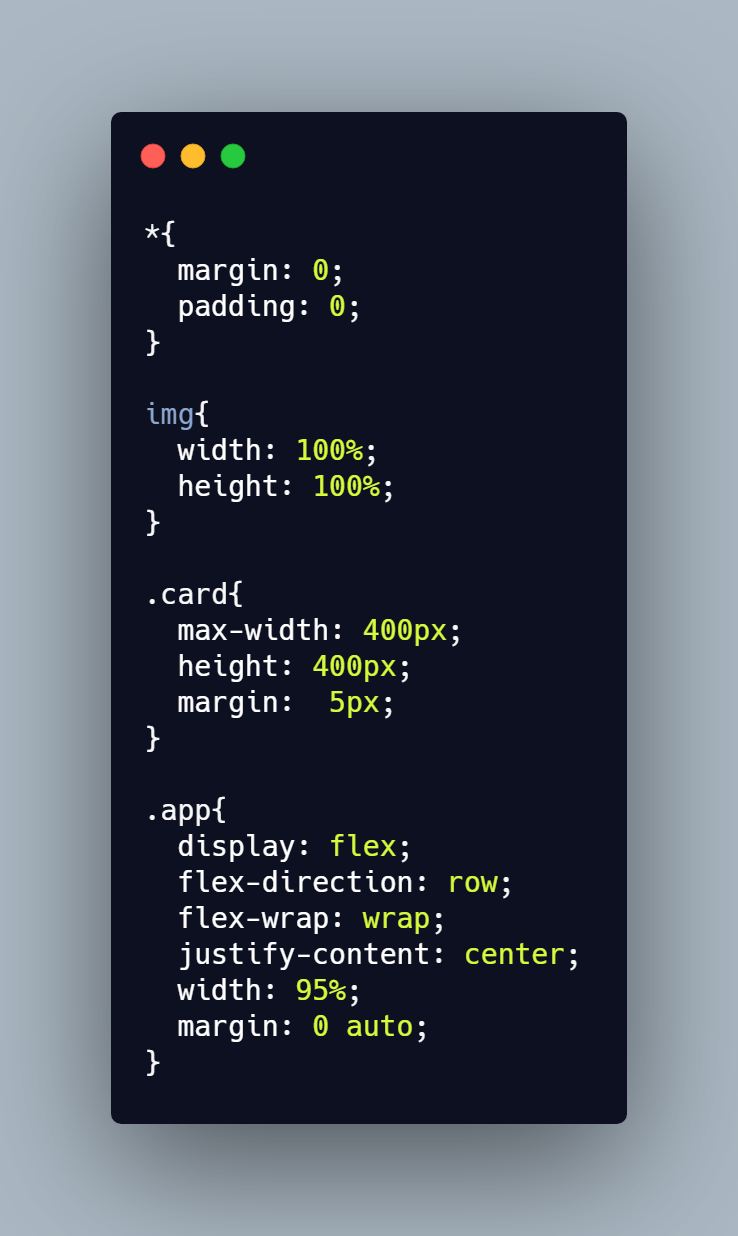
To make it look better, let's add some CSS:
So here, you have been able to connect to an API and display the images from the API on the browser using DOM.

Thanks for reading :)